How to Make a Grain Sack Striped Workshop Table
I've been working on my workshop (craft-slash-office space) for some time. I knew that I wanted to paint the main work table, but I could NOT decide what color or style. Stained top? Painted legs? Plain white? Something fun? It's been a major stumbling block for moving forward on this room. That and the jigsaw puzzle of figuring out that plus everything else -- walls, other furniture, slipcovers...
Well, as you know, I finally decided (thanks to the inspiration from Pinterest and this book), to keep the walls white. Then I decided to refinish the wood buffet (still in progress). Which meant, yay, I could paint the table. I knew I wanted the top to be white to aid in photography for the blog, but I also wanted something fun since the rest of the decisions so far have been pretty staid. But what?
Kathy of Petticoat Junktion to the rescue!!
I was reading her amazing blog, and saw this adorable grain-sack inspired table:
Isn't that swwony? I mean, who could resist with the cute turquoise paint and the vintage quilts and chenille. I emailed Karen immediately and asked her if I could copy her for my table, and she graciously said yes (and also said I could share a picture or two of hers here so you could see -- thank you, Kathy!!).
This is how I did it. First I had to pick a color. True to form, this was agonizing and took a long time. Here's just a few of the samples I tried (some new, some from my stash)
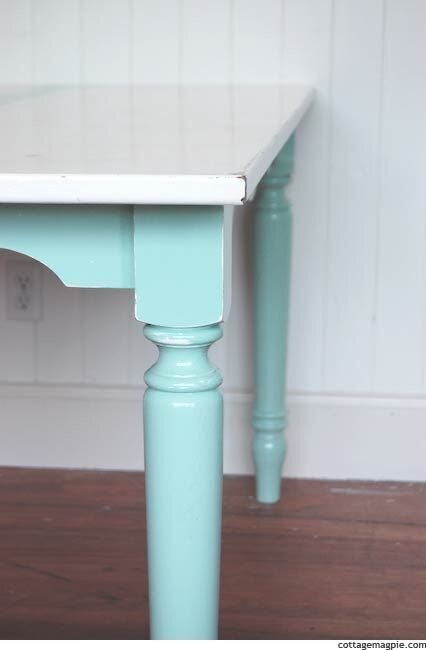
I'm glad I held out until I found the exact vintage-y blue-y green-y color I was looking for. The legs are Aloe (SW 6464) and the top is Steamed Milk (SW 7554).
I drug the table outside, sanded the top some and stained it dark walnut to give it some age before I painted. The top got a coat of primer and two coats of white, and the legs just got two coats of green since they had been primed and painted white by the previous owner.
Once the paint was dry I distressed it, then brought it inside to do the stripe. I used the same basic technique that Kathy did, shown here:
I used plain masking tape to tape off the center stripe, because that's what I had on hand, so I cut in against the tape when I painted my center stripe. Then, like Kathy, I hand-painted the thin stripes with a tiny little brush. I used the tape as a guide to keep them straight. They're definitely hand painted (read, wobbly) and I love them.
I distressed the stripe, too, just a bit, then polyed the whole thing. Three coats, and I buffed in between. I don't usually bother with multiple coats or buffing, but with a table that will get hard use I thought it would be worth it.
My work table is a repurposed kitchen table that I got for $40 at a garage sale. It's a standard 3' x 5' table, and I thought a 3" stripe seemed about right. The skinny stripes are small, maybe 1/4" wide? And the width of the tape apart from the main stripe. You'll notice Kathy did two skinny stripes on her table, and it looks great. I did mine from memory and only put one. I actually like Kathy's version better, but it's already polyed so I'm going to call it good and be happy!
Here’s a side-by-side of the before and after:
Whew! Now on to the next project.
I’m completely in love with the whole thing. Too bad it’s usually covered with works in progress!
Here’s a few more pictures:
Do you all struggle as much as I do with making decisions? It seems so effortless for most people!
Thank you again, Kathy, for letting me share your great work and copy your idea!


Angela’s first house design was round and surrounded a tree. That was 5th grade. In 7th grade she asked her parents if she could build a partition wall in her bedroom to make an entry hall. They refused. Now that Angela is grown up and gets to make her own decisions about partition walls, she’s on a mission for herself and every other woman to absolutely love her home. When she is not hanging out on the internet you can find her sewing, gardening, quliting, reading or, most frequently, daydreaming.
Instagram | Facebook | Twitter